Thursday, August 31, 2017

NEWS - Changes to the Blogs

Good morning everyone!  I wanted to make everyone aware of the changes that will be taking place effective September 1, 2017.  On that date, ALL design team posting will take place on Lost Coast Portal to Creativity.  The team will no longer be posting here even though the blog will stay up in order for all our readers to search through and view old posts.

If you have any questions, drop me a line at mcgoo4@gmail.com.

Thank you.
Marilyn
LCD/CV DT Leader

Three Tenors

Greetings from Laurie to all you Lost Coast fans as we approach the end of summer - where did it go??  Way too fast!

It has been so much fun making things for the event at Lost Coast Designs:  Tip Your Hat.
 I find I can make and place a hat on just about anything, if it doesn't already have one.  For this one, I used one of my favorite LCD stamps Three Waiters.


I stamped these guys with black ink onto white cardstock.  Using Copic markers I gave them a little skin tone, and using an orange marker I filled in the stripes on their aprons.  I then cut hats out of some different scraps of paper I had and attached them.  (If you look closely, you can see that the hat of the guy on the left has a chicken on it!)

I attached my stamped image to a background I created with my Gelli plate and some acrylic paints and stencils.  Before I painted and stenciled, I used some matte medium to collage some vintage papers onto my white yardstick so those images show through the paint as well.  I added a few random stamps in black in to fill in the bare spots and edged it with black marker then layered it with a piece of white card stock.

Final step was to stamp the word Sing with black ink onto white paper and cut our around the letters.  I affixed this atop my card with foam tape to give it some dimension.

And voila!  The "Three Waiters" become "Three Tenors"!

Go do something creative today and if it's got a hat then hop over and join out Tip Your Hat event.  The linky is open until September 14th!!


Tuesday, August 29, 2017

You Can Keep Your Hat On

Good morning and happy Tuesday. It's Sue here again with a few more pictures of how I made my handsome guys ring their bells!


I started by making a DOX background on some chipboard and cutting to shape with a Tim Holtz die. I then stamped Tres Caballeros, so my base layer is done.


Stamped again on another layer, background coloured, and cut out.


Stamped again and faces and clothing coloured. Yet more cutting out  - why did I start this lol.


Guess what, stamped again, coloured and cut out. 


I stamped the sentiment from the stamp beneath my handsome chaps, then built them up with foam pads.
I die cut the base shape a few times and trimmed out the frames then built these up and painted in silver.
Finally I stamped and coloured some of the hats from Party Hats 2 and added them to the frame. Then I die cut the Tim Holtz easel so it's now freestanding. 
Still something missing - so I dug down into my Christmas stash and found my jingle bells - now we're done!
There's still loads of time for you to join in with our fun event. Just make sure that your characters are suitably dressed - no admittance without a hat, and I'll see you over on the portal.
Have a wonderful week, and thanks very much for looking x

Monday, August 28, 2017

Evil Grin

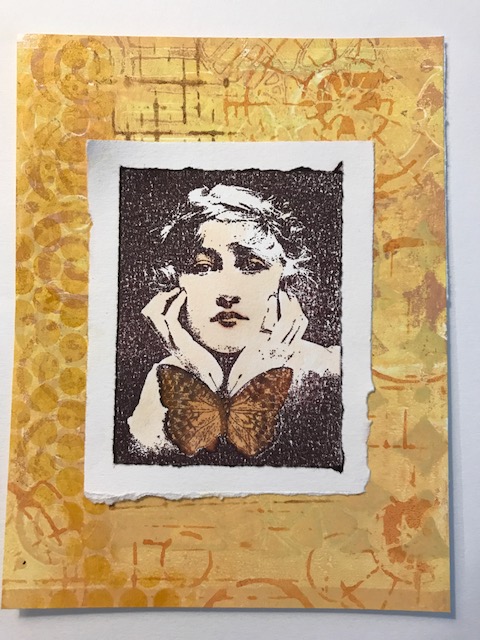
Hello all in blog land. Cathy here to show you how I did my Cheshire Cat card.
This was a great card to do.
Items you will need for this, photo paper, Distress Oxide ink, baby wipes, soft cloth, stencil, black ink pad,  verafine ink and white paper.
 Here is some of the stuff you need for it.
 
 Here is what the photo paper looks likes after you do the smooching technique with the Distress Oxide inks. I did one color at a time. Dried in-between colors. *note always move heat gun* The heat gun will damage the photo paper if you keep it in one spot for to long.
I hope you can see it is cloudy in looks.
                                                          
Next you take the soft cloth and buff the cloudiness away. (the Oxide ) You can see me start it in the corner here.
Here it is done after the buff. The paper has a shiny/glossy look to it. At this point you can leave it here and got on to stamping. Not me though. See that darker spot on the paper. This is where I too my baby wipe to get rid of the darker spot. (sometimes you will get streaks just keep wiping it till they go away)
After the baby wipe.
Next you just have to stamp your image on the photo paper. Me I chose the Cheshire Cat. I then I stamped it on white paper and cut out the eyes and fangs and glued them on the front of the image. It makes it pop I think. Cut the image out and layered on white cardstock.
For the stencil background I took a stencil (one from Tim's Halloween last year) and used my Versafine ink through the stencil.


Friday, August 25, 2017

Walking The Fish

Hello, Gail here today with a journal card using the fabulous Ballerina With Fish.  


I love this quirky stamp from Carmen's Veranda and doesn't it just go perfectly with that sentiment.  


 I started by stenciling with distress ink.  I bumped the stencil and applied a different shade of distress ink. 


Then I flipped the stencil and applied a third distress ink colour.  


I smeared Blueprint Sketch distress ink randomly around the edges of the journal card.  


I stamped the sentiment on a piece of paper and ripped the edges.  I stamped, embossed, fussy cut and coloured Ballerina With Fish and also added some ripped pieces of vellum.  If I ever get around to doing a Project Life layout  think this card will fit in just perfectly.  

Thanks for dropping by.  The Lost Coast Portal to Creativity challenge closes tonight but you still have today to link up your stamped projects with a stenciled background.  See you there.  Hugz


Wednesday, August 16, 2017

Wistful Butterflly Lady

Greetings to all the Lost Coasters checking out the Review!  It's Laurie here with another project to share with you.  This one was made for the Lost Coast August Challenge - Stenciled Background.  I really never got into stencils until about a year or so ago, and now I wonder what took me so long!  So many things you can do with stencils - the sky's the limit!

I created this card with the Head In Hands stamp from Lost Coast Designs.  I love this stamp - it has a very peaceful, gentle feel about it that really appeals to me.


I stamped with dark brown ink on white paper then tore around all the edges to give it a rough appearance.  That got mounted onto another torn edges piece in white.  I colored the lady and the butterfly with Copic markers, just keeping the composition and color palette simple.

The background was made with my Gelli plate.  I started with yellow paint for my background then used some stencils with orange and brown paints.   I used three or four different stencils here to give the background some interesting shapes and colors.  Looking at her in this piece, it almost seems that she is looking right into my eyes!!

Don't forget to join up your stenciled stamped creations to the 
Lost Coast Portal to Creativity.  
You don't need to use Lost Coast Designs or Carmen's Veranda stamps, 
but of course, we would love to see them if you have them!!


Go create and have fun!

Sunday, August 13, 2017

4x4 Steampunk Tile

Hello all. Cathy here with a 4x4 Steampunk Art Tile.
So I went and grabbed 1 of my 4x4 Art tiles. I felt like using my Distress Oxide inks. I thought what colors have I not played with? Brown. So I grabbed the browns. Walnut stain, vintage photo and antique linen.
I did the smooching technique with the inks and a craft mat. When I was happy with the background I moved on to adding my stencil.
Next I stamped the bird on bike with black ink. Then I added some gears to the wheels of the bike. Stamped the Steampunk word from Carmen's Veranda. Then I cut the word in half. Edged the word and 4x4 tile with vintage photo. Glued word and gears on top and done....


Thursday, August 10, 2017

Bad Advice Baby

Hello and welcome to the Lost Coast Review.  Gail here today and I wanted to share how I made my Bad Advice Baby project that you might have seen over at the Lost Coast Portal to Creativity.  This month the challenge is stenciled backgrounds and this is a great way to add depth and interest to your projects.  

I have decided that Happy Skeleton is a baby due to his romper suit and those obviously baby teeth.  Ain't he just so cool!!


I started by stamping and embossing the Free Advice sentiment from Carmen's Veranda.  I sponged Mowed Lawn distress ink through my stencil, flipped it over and sponged Evergreen Bough distress ink.  Flipping the stencil reverses the pattern, with can give a dramatic effect, depending on how symmetrical your stencil is.  This one, which incidently I found in the cake decorating section of the local cheap store, isn't so complex.  


Then I stamped Grunge Border 3" with Spiced Marmelade distress ink.


A bit more interest added using a numbers stencil and Hickory Smoke distress ink.


I stamped, embossed and fussy cut Happy Skeleton and coloured his romper suit with neon gel pens.  I gave him a bit of washi tape to stand on and a pair of googly eyes, to add that extra bit of crazy, and he's good to go.  

Thanks for dropping by.  Do check out The Lost Coast Portal to Creativity for more gorgeous stencily inspiration from the team and the challenge details and linky.  See you there.  Hugz


Monday, August 7, 2017

Twinkle Twinkle Starry Cat

Good morning and happy Monday. It's Sue here and I'm so happy to be sharing my first piece with you this month for Lost Coast Designs. It's time for a new challenge and this time around it's one of my favourites - stencils. Here's what I've made.


I started by stencilling my stars with some silver texture paste. I then sprayed with some home made shimmer spray to make my universe. I die cut the moon, stars and Earth - wow think big eh!


Then I made a Distress Ink background and stamped Cat Star Wings. She's been coloured with glitter and white pen.


I printed my sentiment on the computer.


And all done.

So please join in and play with your stencils. They don't have to be bought, home made stencils are fine and so much fun.  Thanks very much for looking and don't forget to keep calling back for lots more inspiration. Have a great week, Sue x


Friday, August 4, 2017

Party Time

Hello all you out there. It's Cathy here with a fun card today.
This card I made using items I haven't used for ages( really years) Shhhh don't tell..... First off I stamped Goth Mask on Copic friendly paper. Colored with Copic markers. Layered it on black cardstock. Here is the stuff I haven't used in ages. Versamark and embossing power. I haven't heat embossed in years. I took out my Corner Swirl and stamped it with versamark and used the white embossing power on it. Next I used the versamark as a watermark ink. That is what the darker ones are that you see.
So I say grab something you haven't used in ages and have a go with it again. Thanks for stopping by.